


You Had Me at Muscari
Celebrating spring... any excuse for flowers and cake!

It’s happening, people… I think we’ve finally turned the corner and left winter behind. Good riddance! The sun is out, the bulbs are blooming, and Easter weekend is fast approaching. It’s funny how Easter knew this would be a good year to land a little late, kindly giving the weather a chance to catch up.
As much as a I love chocolate eggs and hot cross buns, Easter isn’t my real cause for celebration… springtime is. All those fresh shoots emerging, blossom trees bursting into action and a soundtrack of birdsong after a long, dark, and rather soggy winter is all the reason I need.
My dear friend and gardening soulmate, Jessica Clark, florist extraordinaire and owner of Quince Fine Florals, had the wonderful idea that we should combine our talents to celebrate one of our favourite spring flowers… the beautiful and dainty Muscari Valerie Finnis!
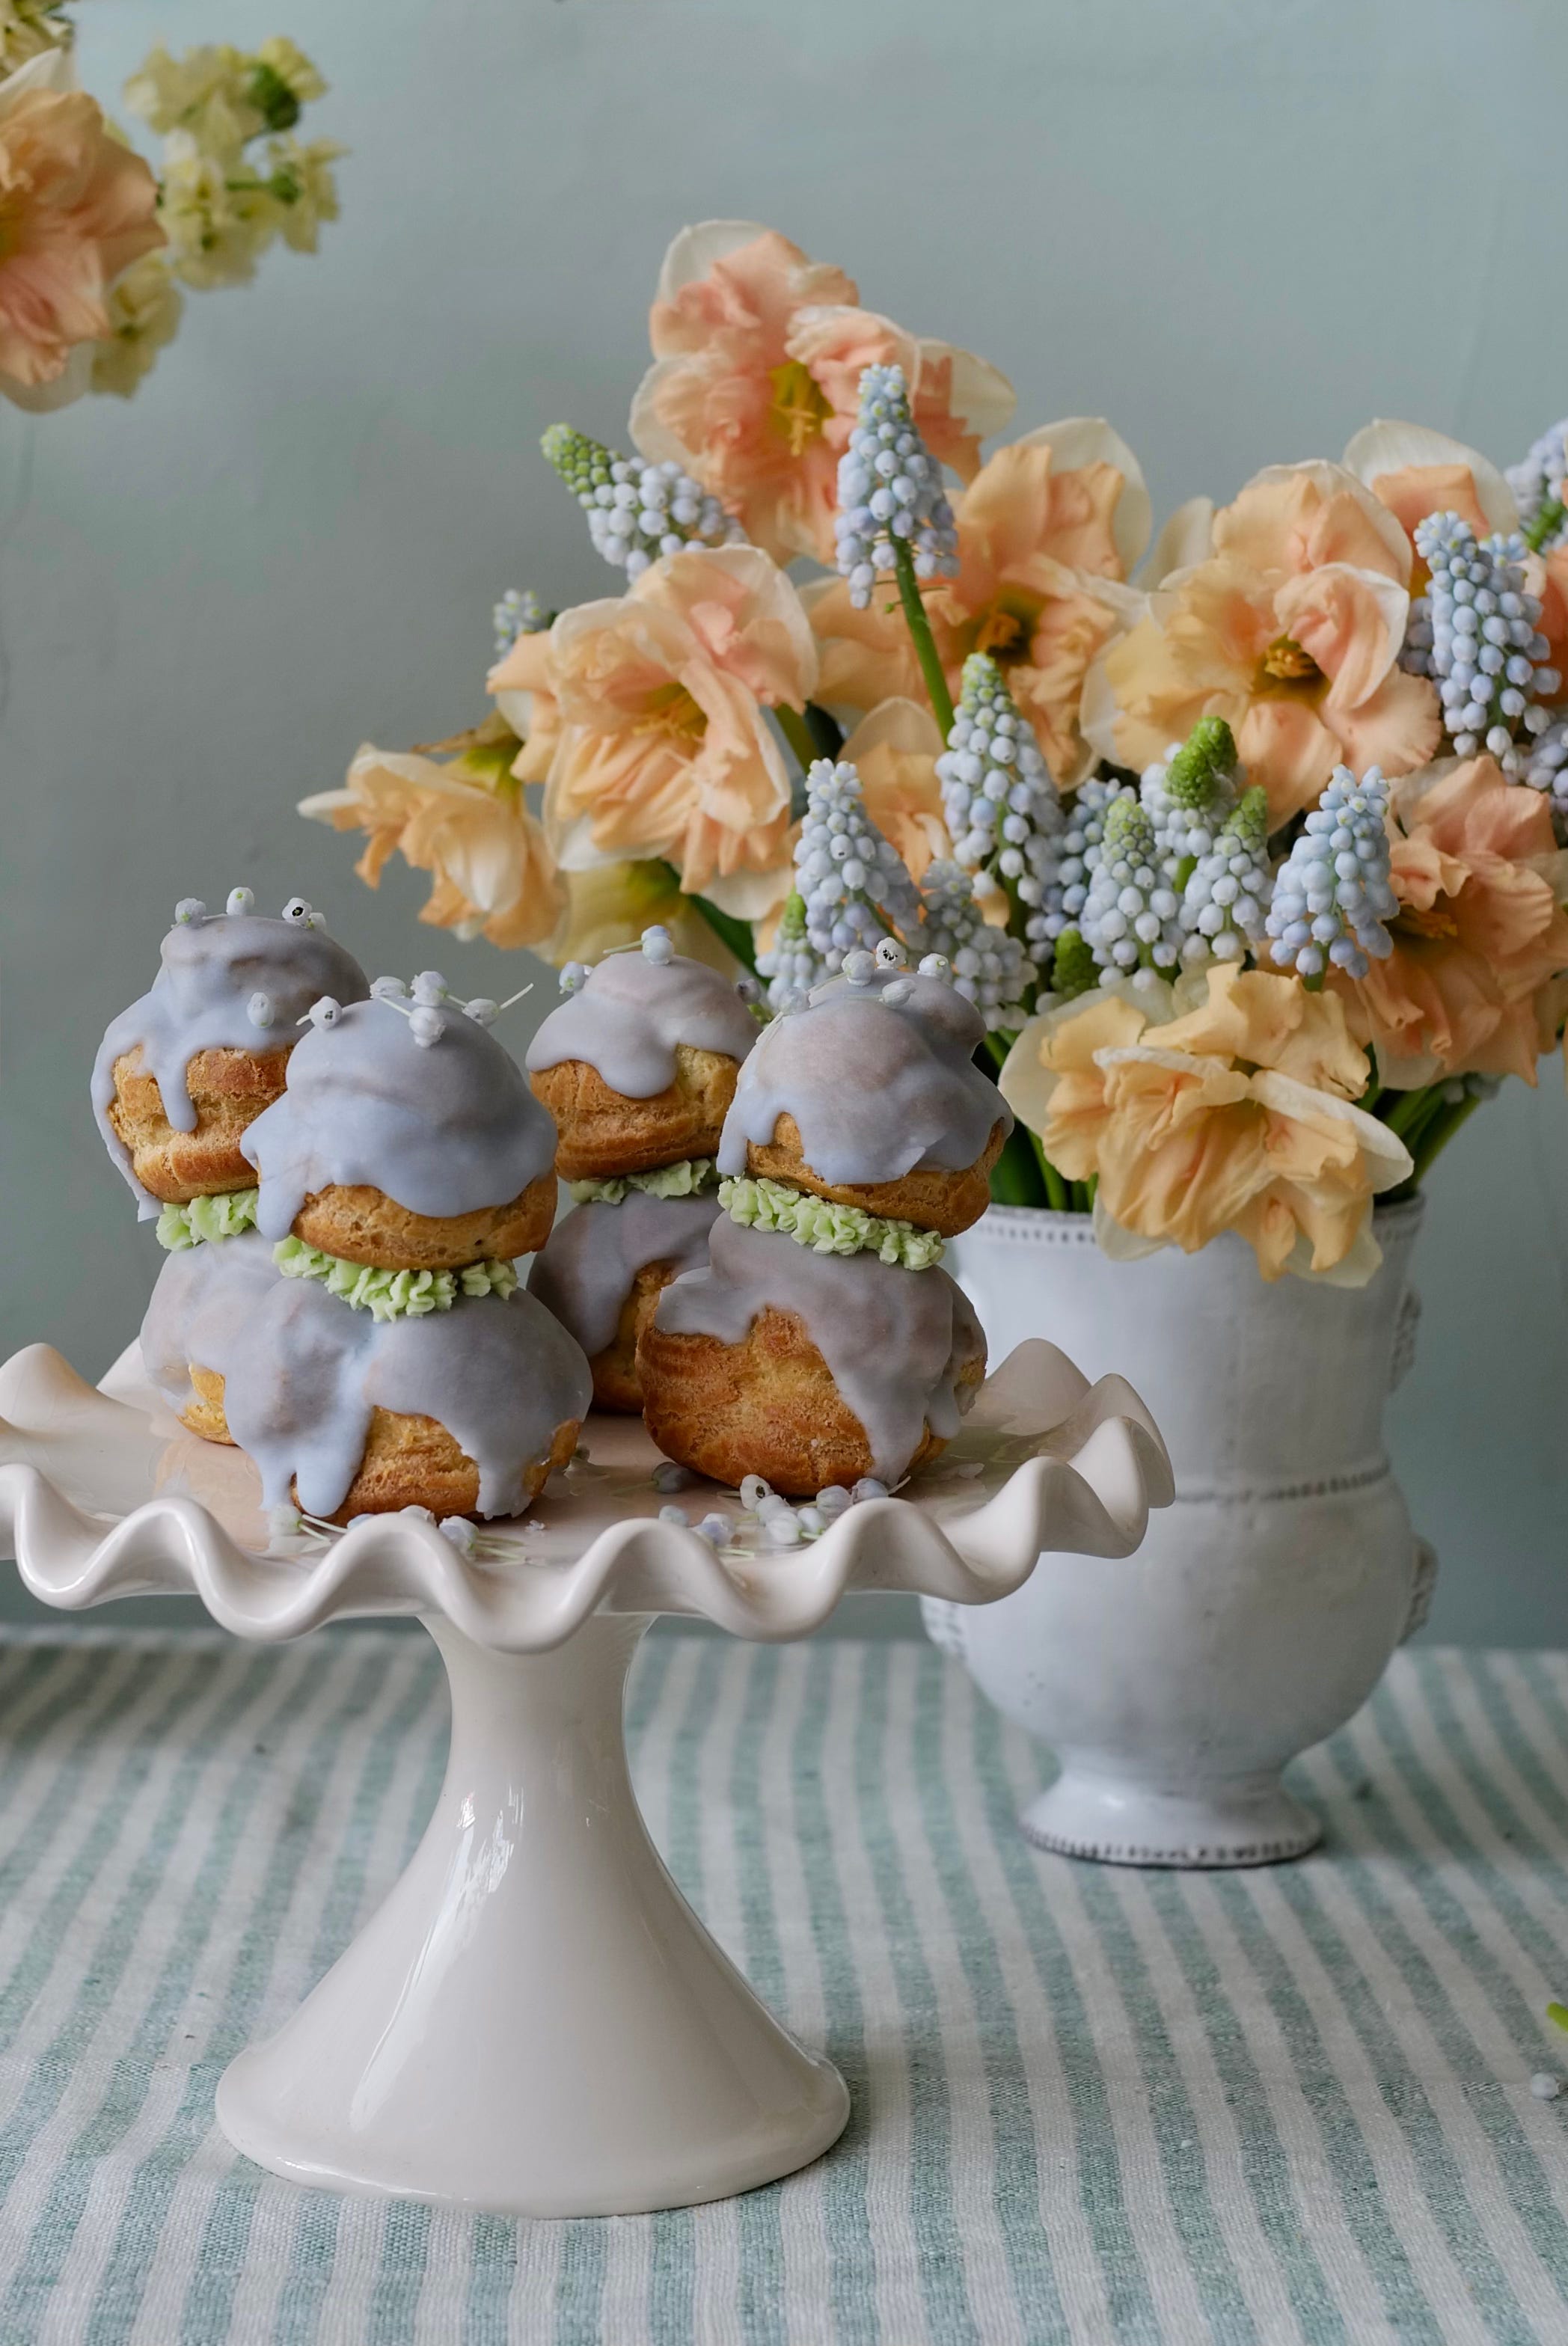
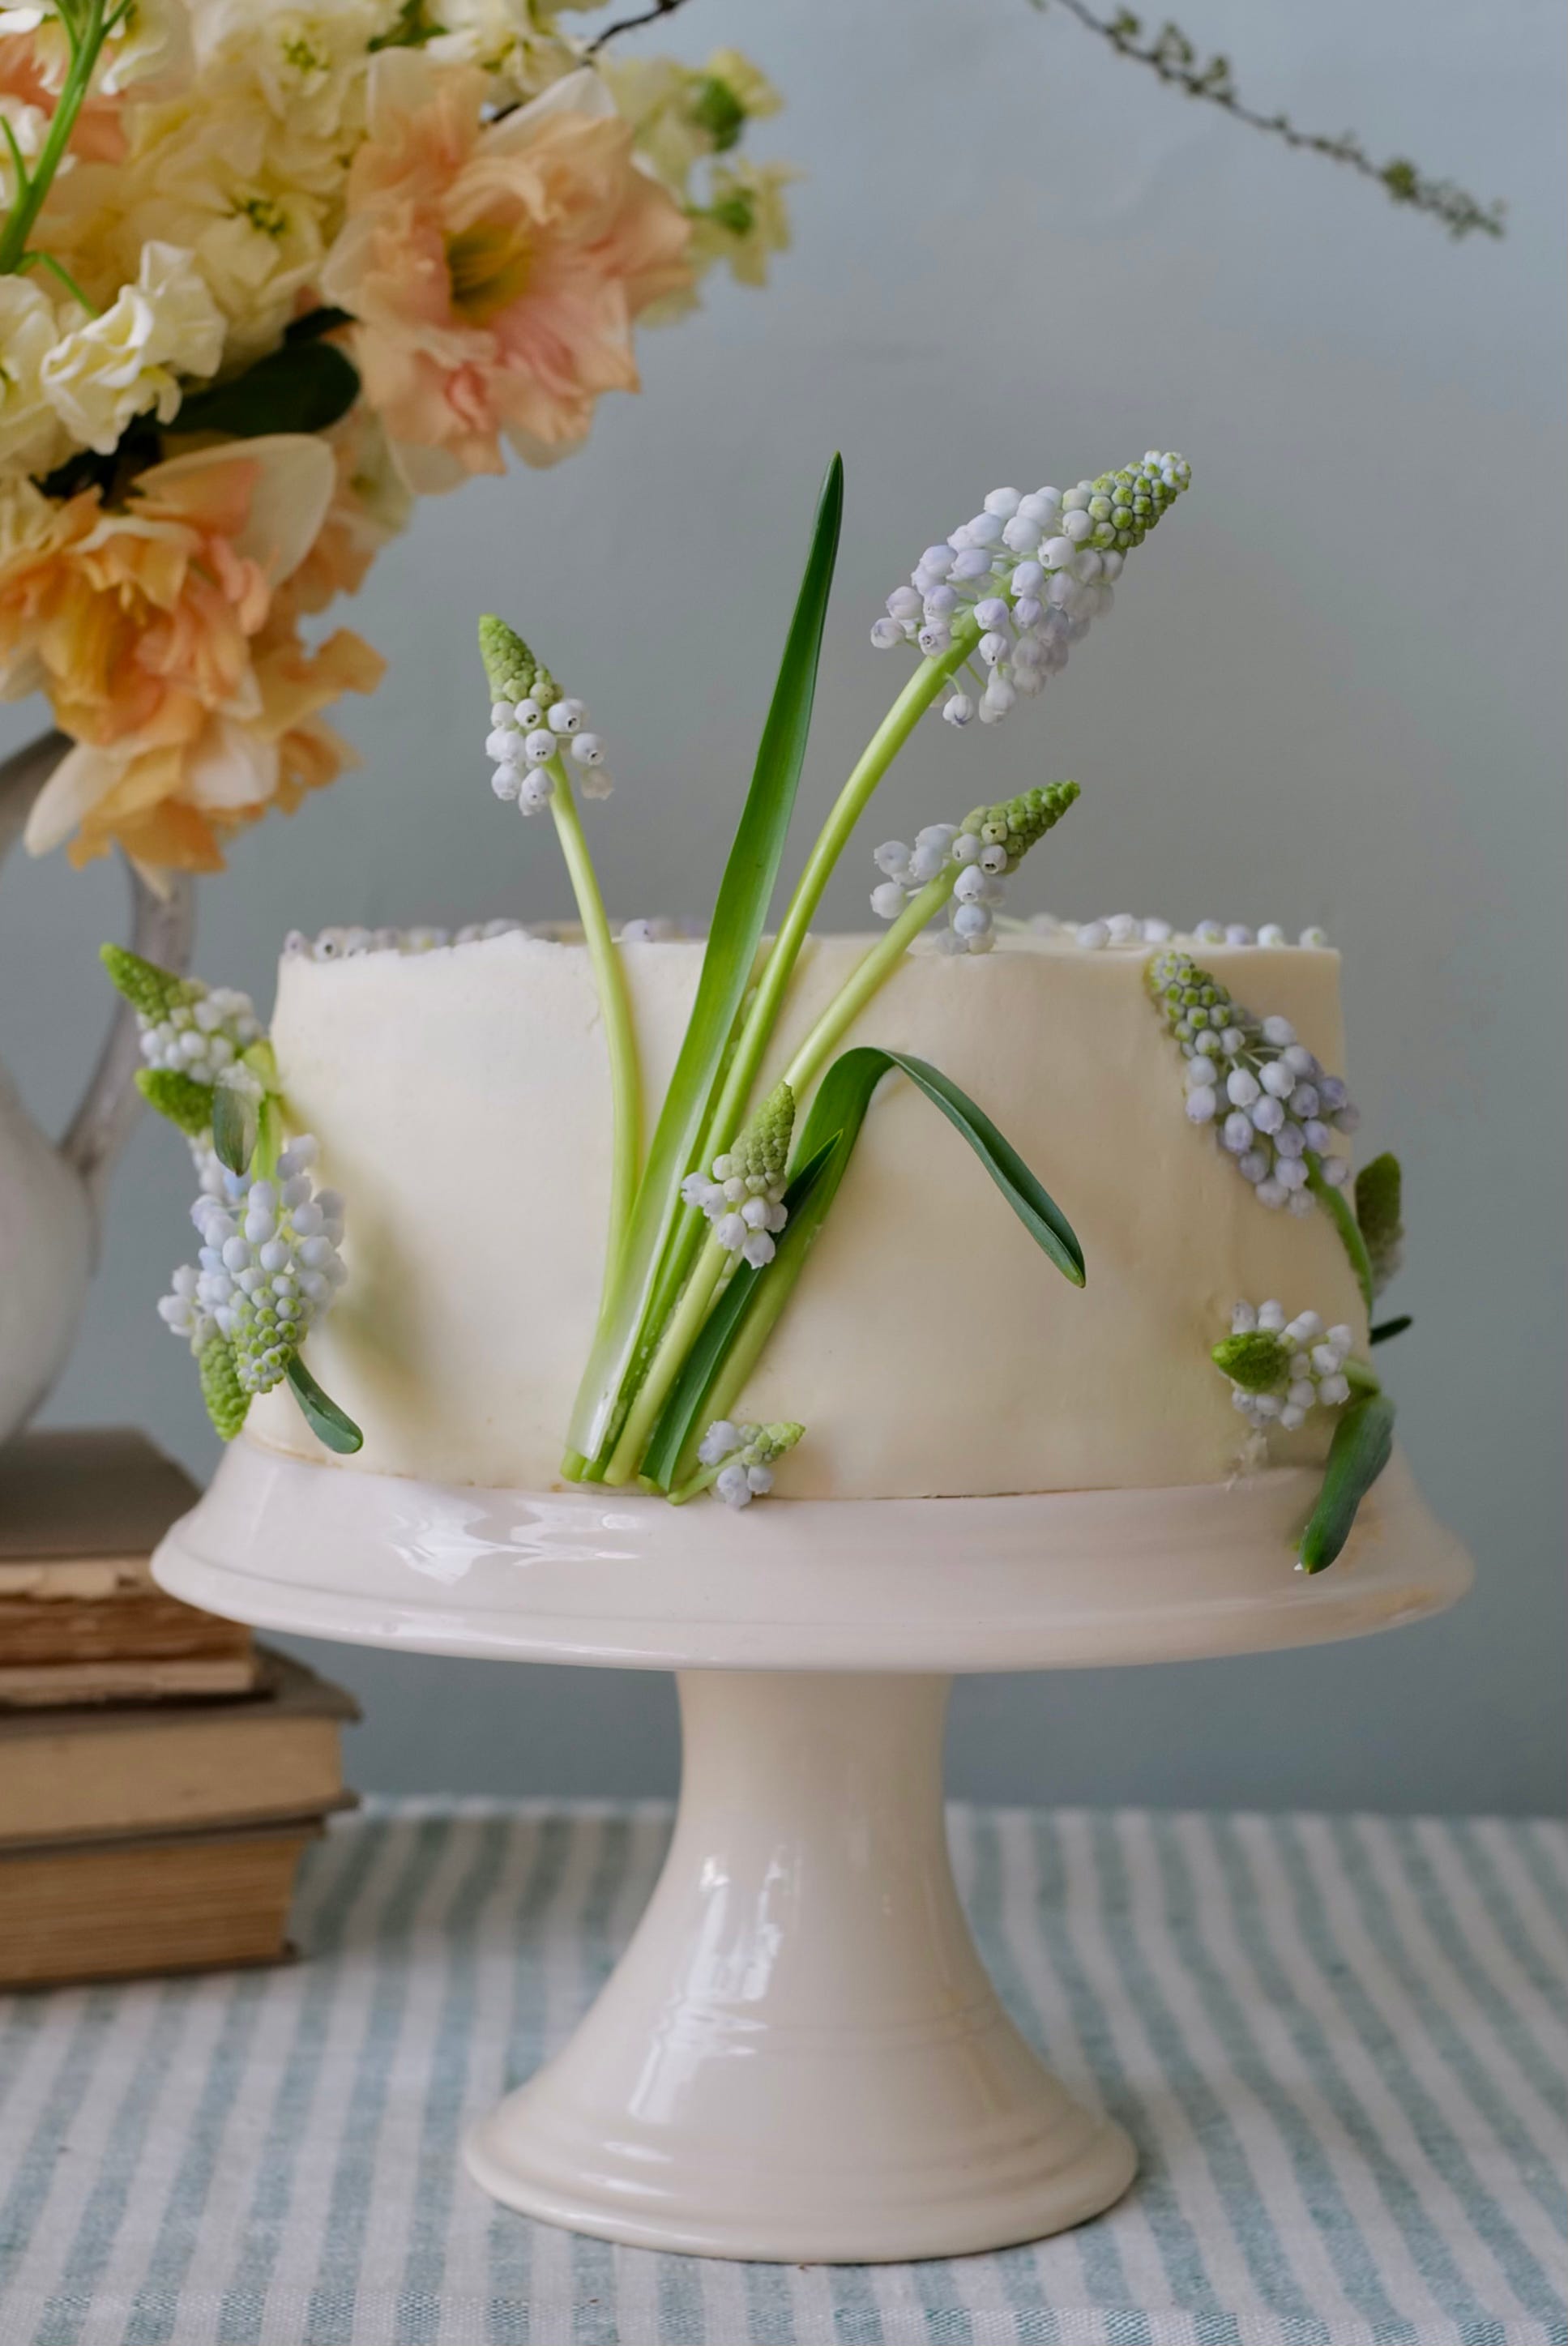
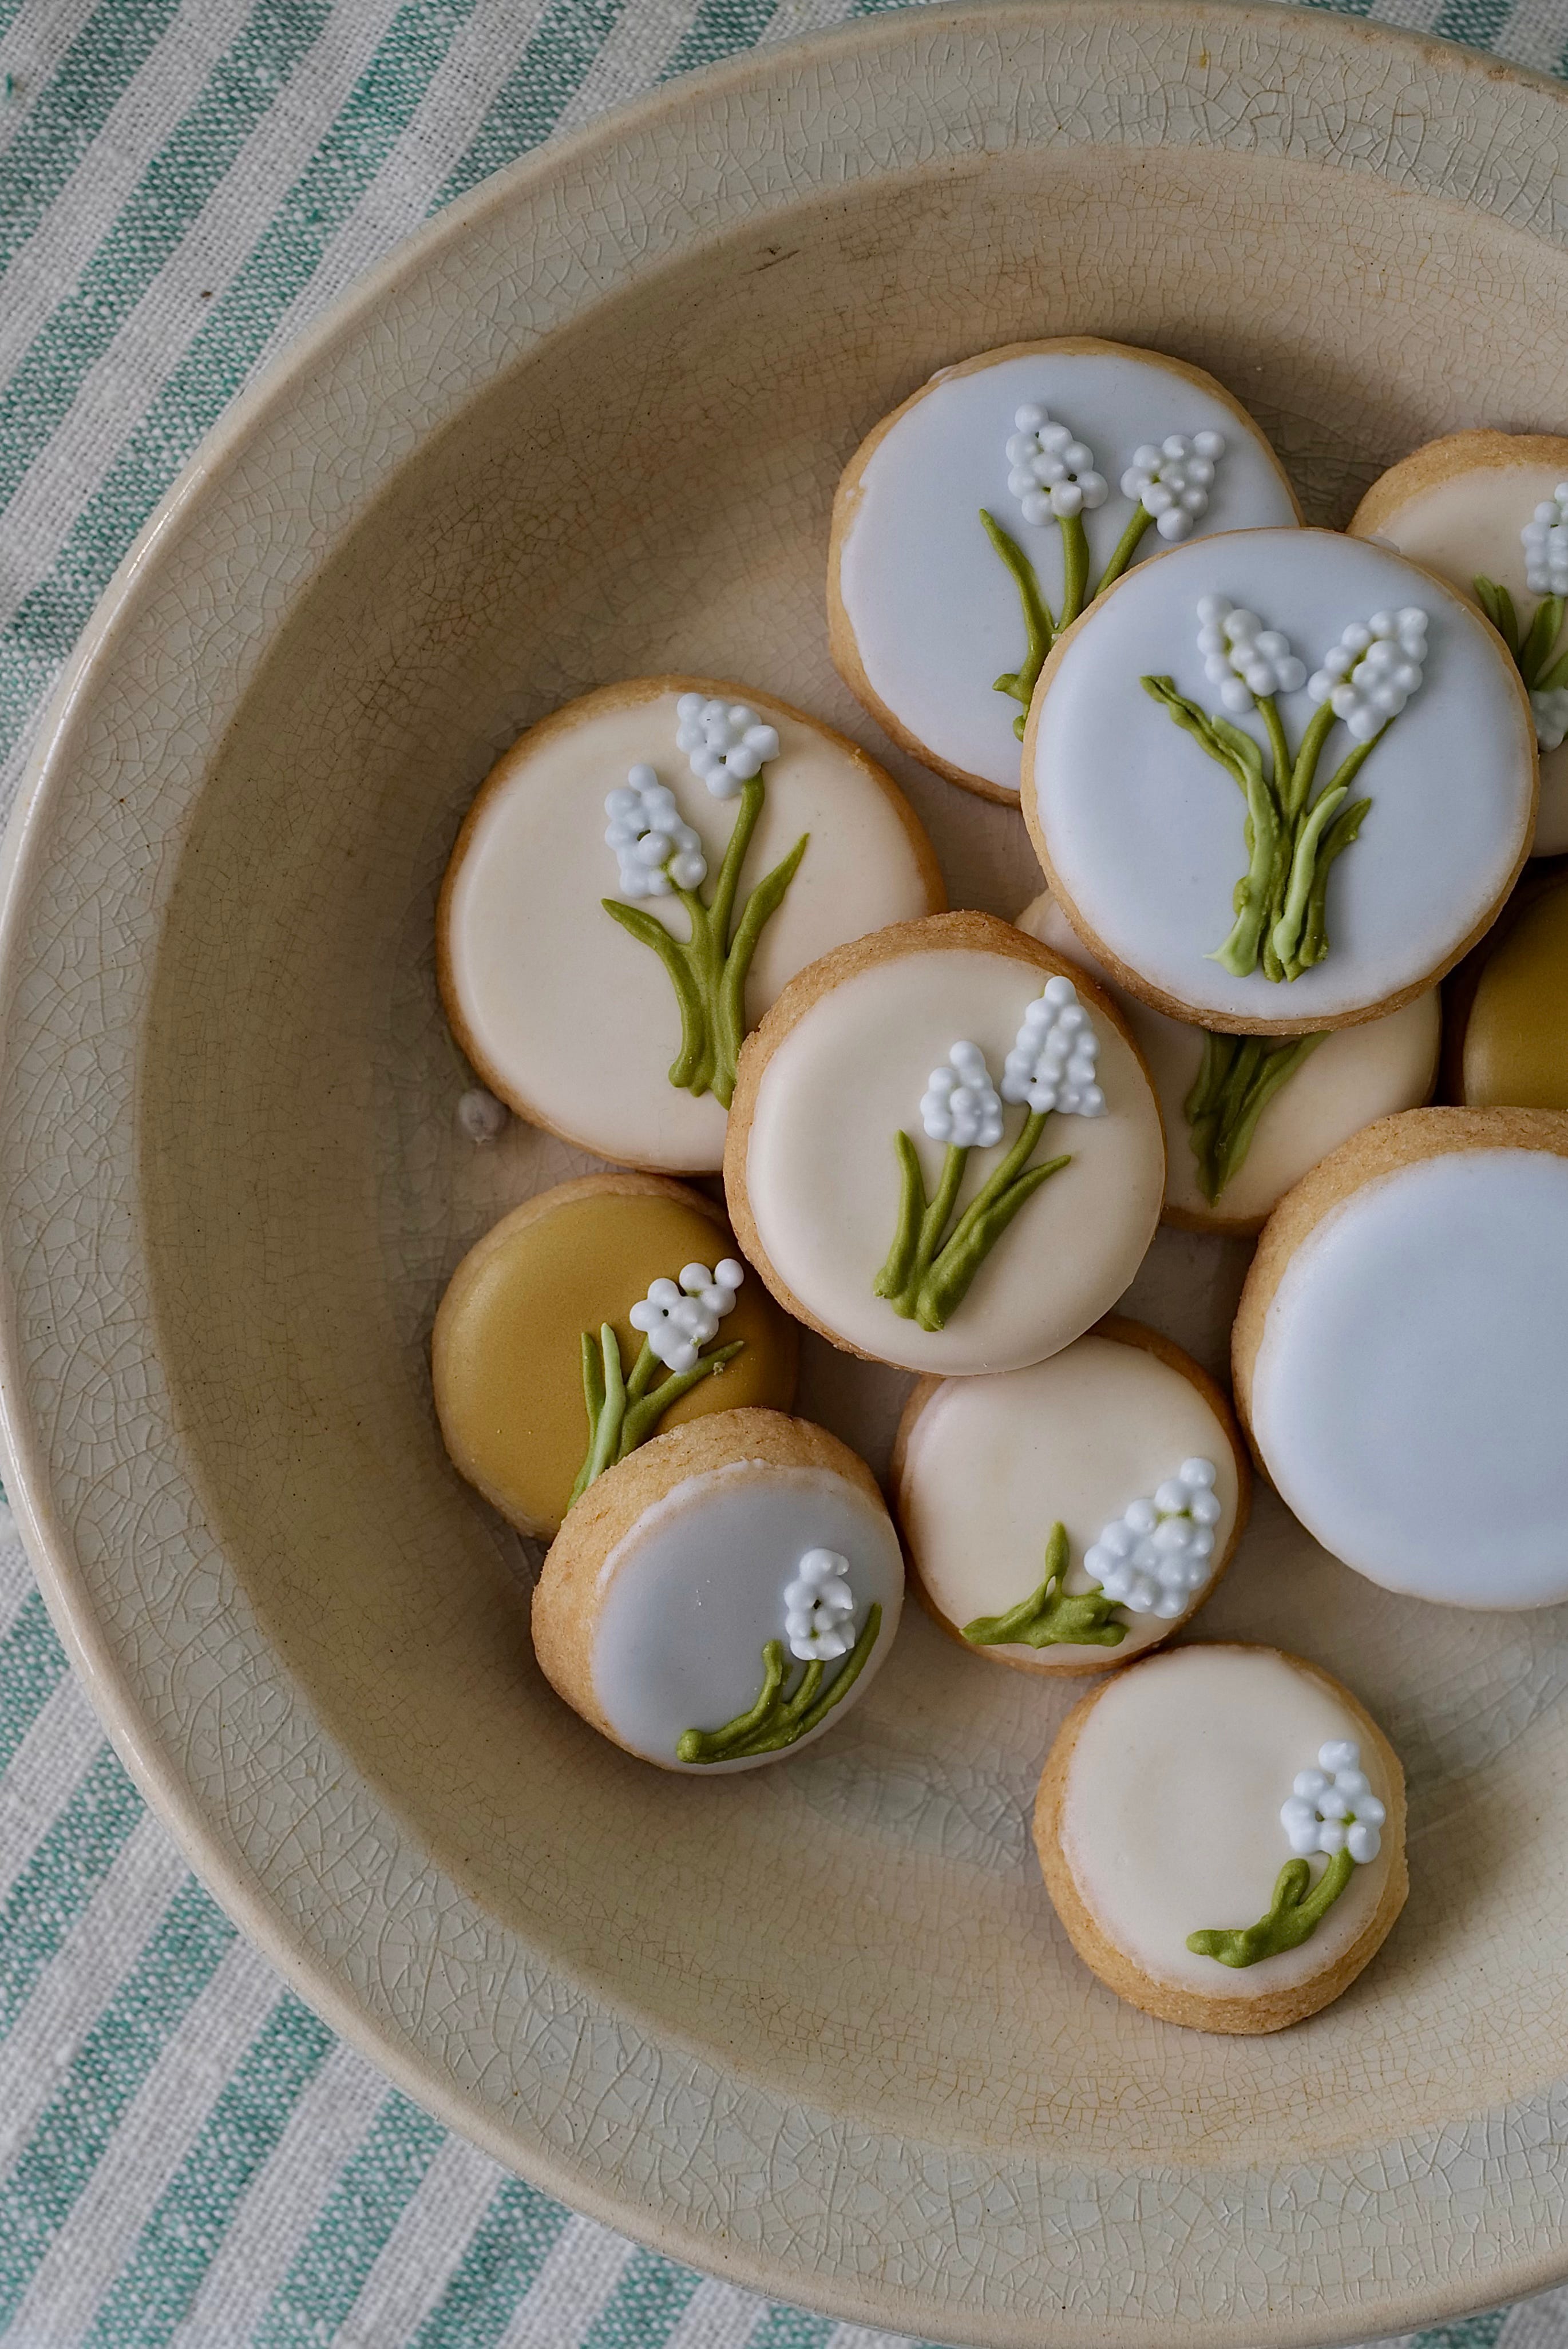
Muscari, commonly known as grape hyacinth, comes in a variety of colours: blues, pinks, white, and even yellow, but it is the pale icy blue of Valerie Finnis that Jess and I love the most. In my deep dive on muscari, I was pleased to discover that its flowers are edible (the bulb itself is not, so don’t snack on that part if you know what’s good for you). My taste test revealed the flavour of the flower to be very mild, slightly sweet with just a hint of grape, making it inoffensive and an easy accompaniment to most baking. The stem and leaves, on the other hand, are rather nasty, so I’d consider their contribution to be strictly decorative. Knowing all of this, I let my imagination run and came up with some lovely ways to highlight Valerie Finnis through baking. I had a lot of fun (my knitter’s elbow would argue this) decorating sugar cookies, and pulling apart the tiny blooms to sprinkle atop eclairs glazed in a similar shade. In the end though, it was the simple act of decorating an iced layer cake with just a few graceful stems that made Jess and I the happiest. Using the fresh flowers gave the cake an elevated finish that is both subtly beautiful, yet impactful, much like the muscari are themselves when found in the garden. Combined with Jessica’s dreamy floral arrangements, it made for a perfect afternoon and I think sweet little Valerie Finnis really appreciated our effort. I hope all this delicious beauty inspires you to celebrate your favourite spring flower too!
I have included my recipe for a classic white cake and simple buttercream, which I think create the perfect foundation to flex your creative muscles and decorate with spring flowers. If you aren’t as passionate about muscari as Jess and I, some other edible options would be pansies, viola, roses, chamomile or begonia petals.

Classic White Cake
Makes: One 8-inch cake
3/4 cup (6 oz) butter, room temperature
1 3/4 cup sugar
5 large egg whites, room temperature
2 tsp vanilla extract
2 3/4 cup pastry flour
1 tbsp baking powder
1/2 tsp salt
1 1/2 cup buttermilk, room temperature
Butter Cream
2 cup (16oz) butter, room temperature
6 cups icing sugar
1/4 cup whole milk
1 tbsp vanilla


Preheat the oven to 350°. Butter two 8-inch cake pans and then line bottoms with parchment (this is how I like to create the perfect parchment circles for cake pans)
On a large piece of parchment paper, sift the flour and baking powder. Add the salt and set aside.
In a stand mixer, fitted with the paddle attachment, beat the butter on medium speed until pale and fluffy, about 5 minutes. Scrape down the sides of the bowl halfway through.
Add the sugar to the butter and continue to beat on high until pale and fluffy. Scrape the sides and bottom of the bowl. On low speed, mix in the egg whites and vanilla, then beat on high until thick and smooth. Scrape down the bowl again.
With the mixer running on low, pick up the piece of parchment from opposite corners and tip about one-third of the flour mixture into the bowl. Mix until just combined. Scrape down the sides of the bowl and add half of the buttermilk. Mix again. Repeat this step and then finish with the last addition of the remaining third of flour mixture. Scrape down the bowl again, making sure to get right to the bottom.
Divide the batter evenly between the two pans and use a spatula or back of spoon to smooth the tops. Give the pans a couple of light taps on the counter to deflate any overly large air pockets.
Bake on the centre rack, rotating the pans halfway through, until the tops are pale golden, and spring back when lightly touched, 30 to 40 minutes.
Remove from the oven and let cool for 10 minutes in pans before inverting them onto wire racks to cool completely.
While the cakes are cooling make the butter cream. In a stand mixer, fitted with a paddle attachment, beat the butter on high until pale and fluffy. Scrap down the sides of the bowl. Turn the mixer off, add the icing sugar and beat on LOW (careful here people…too high and things could get messy) until combined. Add the milk and vanilla and beat again. Scrape down the bowl. Turn the mixer to high and continue to beat until the butter cream is light and fluffy.
Once the cakes have cooled use a serrated knife to evenly cut each cake in half horizontally to create four layers.
Place your bottom layer on a rotating cake stand or plate and top with a heaping mound of butter cream. Using an offset spatula, gently spread the butter cream evenly across the layer. Repeat with two more layers and then place the final layer atop the cake (I like to use a bottom half of one of the layers of the cake, inverted, as the final layer… it makes a lovely flat top for the finished cake without the need for any trimming). Proceed to finish icing the top and sides of the cake with your offset, aiming to create the smoothest finish possible but don’t stress about it too much… flowers will come to your rescue! Or you could skip the floral decoration, and just enjoy the cake.
All of your bakes are so pretty!
Love this! Reminds me of the lemon almond Birthday Cake I celebrate with every year.
check it out:
https://thesecretingredient.substack.com/p/turning-24-my-lemon-almond-birthday